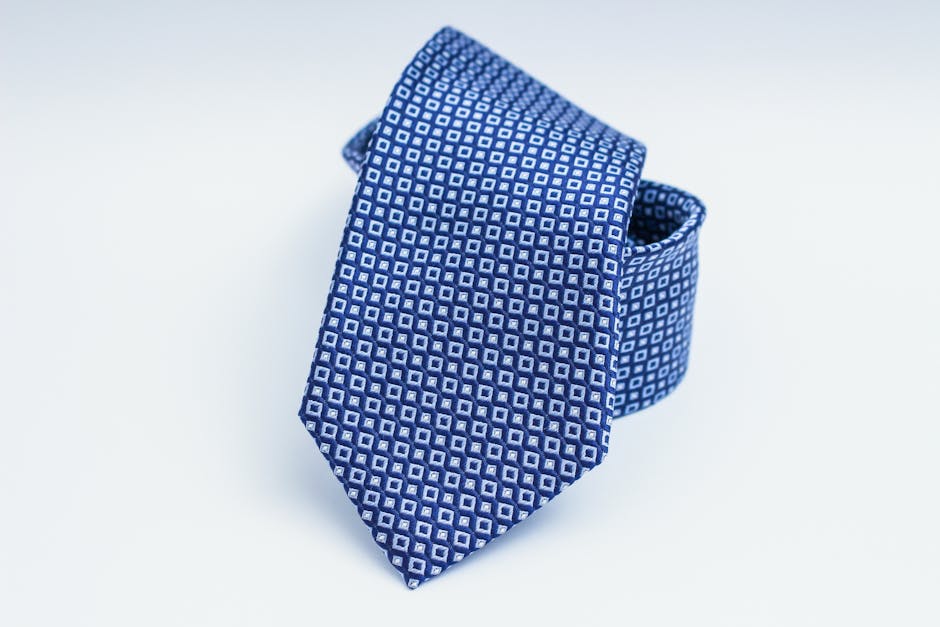
Tying a tie is an essential skill for anyone who wants to look sharp and professional. Whether you’re preparing for a job interview, a formal event, or just want to elevate your everyday style, knowing how to tie a tie can make a big difference. Here are three ways to tie a tie, along with step-by-step instructions and pictures to help you master each knot.
The Four-in-Hand Knot
The Four-in-Hand Knot is one of the simplest and most popular ways to tie a tie. It’s perfect for beginners and works well with most types of ties and collars,
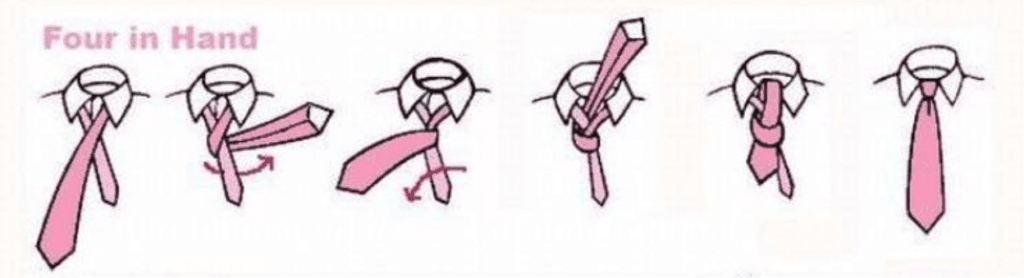
- Drape the tie around your neck with the wide end on your right and the narrow end on your left.
- Cross the wide end over the narrow end.
- Bring the wide end under the narrow end and back over to the right.
- Bring the wide end up through the loop around your neck.
- Pull the wide end down through the knot in front.
- Tighten the knot and adjust it to sit neatly at the center of your collar.
The Half Windsor Knot
The Half Windsor Knot is a versatile and elegant knot that is slightly more complex than the Four-in-Hand. It’s suitable for most occasions and works well with medium to wide ties.
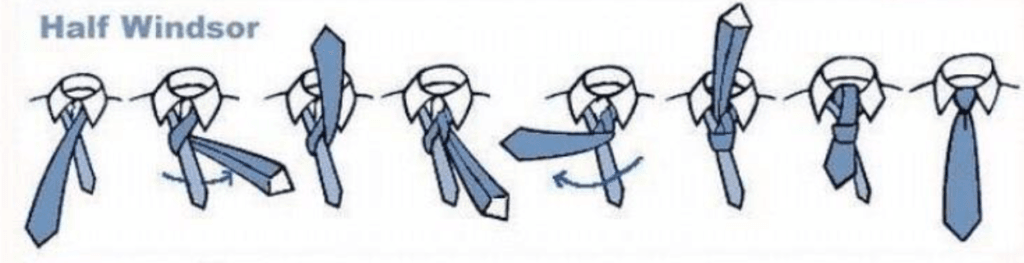
- Drape the tie around your neck with the wide end on your right and the narrow end on your left.
- Cross the wide end over the narrow end.
- Bring the wide end up through the loop around your neck and down to the left.
- Bring the wide end around the back of the narrow end to the right.
- Bring the wide end up through the loop around your neck.
- Pull the wide end down through the knot in front.
- Tighten the knot and adjust it to sit neatly at the center of your collar.
The Full Windsor Knot
The Windsor or Full Windsor Knot is a classic and formal knot that is perfect for special occasions. It creates a large, symmetrical knot that looks great with wide ties and spread collars.
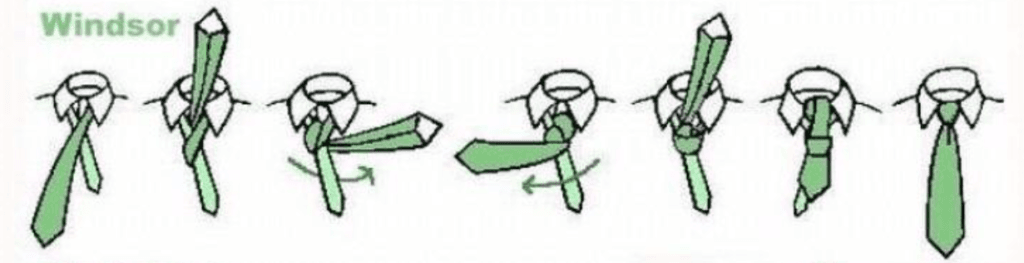
- Drape the tie around your neck with the wide end on your right and the narrow end on your left.
- Cross the wide end over the narrow end.
- Bring the wide end up through the loop around your neck and down to the left.
- Bring the wide end around the back of the narrow end to the right.
- Bring the wide end up through the loop around your neck and down to the right.
- Bring the wide end around the front of the narrow end to the left.
- Bring the wide end up through the loop around your neck.
- Pull the wide end down through the knot in front.
- Tighten the knot and adjust it to sit neatly at the center of your collar.